Wednesday, September 12, 2007

Apples and Scones - Irish Style?


One of the fun parts about baking for me is exploring my family roots through food. Like many Americans, I have a bit of a 'Heinz 57' heritage - a little bit of everything. I've done some family history research and have found some interesting things - I have relatives that came over on the Mayflower (fully documented, I am a member of the Mayflower Society), which came over from England. I have family that emigrated from Denmark and Germany. My two strongest ties, however are to Ireland (I still carry that family name) and Sweden (I still have family with whom I am in contact there). Since my grandmother and aunts were born in Sweden, I grew up exposed to many of the wonderful foods of that country - in fact, I plan to use them in several blog posts to come (although I can guarantee that Herring Pudding will never grace this blog site - yech!!). That being said, I have no expressions of the Irish side of the family - most of my ancestors died very young and lived under very tough and poor conditions once they came to the US, so they didn't take much time to record information to pass down the line. So, my list of Irish family recipes is fairly short - zero. I'm very interested in knowing more about what my family may have been eating some 100 years ago when they emigrated - as well as what the Irish people in general like to eat.

I've found a number of recipes online that claim Irish heritage or at least popularity, but it can be difficult sometimes to sort out the truth from the other stuff out there in cyberspace. Maybe some of my visitors can recommend some good sites for Irish recipes and history?

In the meantime, as I take a short vacation on the Oregon Coast, I begin looking ahead to the change in seasons to my favorite time of year - Fall. I love the weather, cool, foggy, crisp, clean. When I sense those changes coming, I can't help but begin thinking of fall cooking - comfort foods - and for me, my favorite Fall ingredient has to be apples. Of course, we can get apples here year-round, but fall is the time when the best of the harvest come in and everyone's thoughts start to turn to baking with apples.
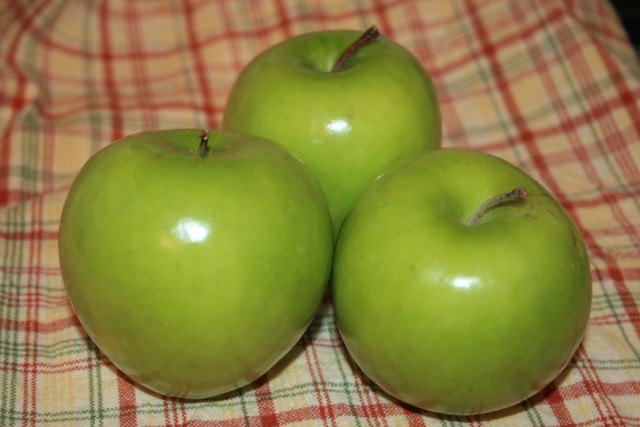
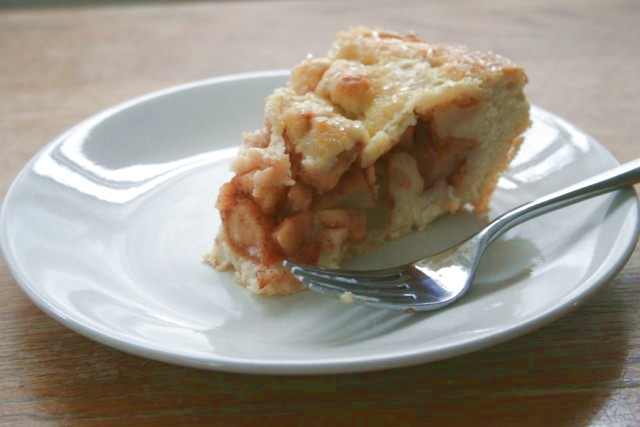
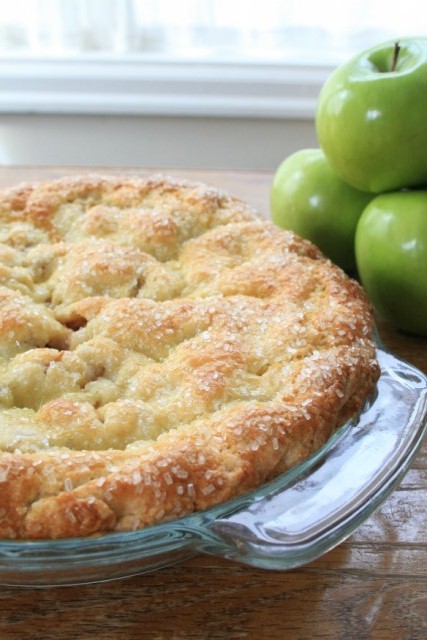
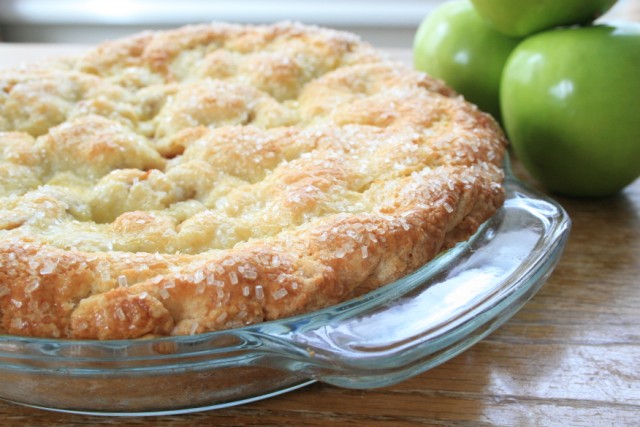
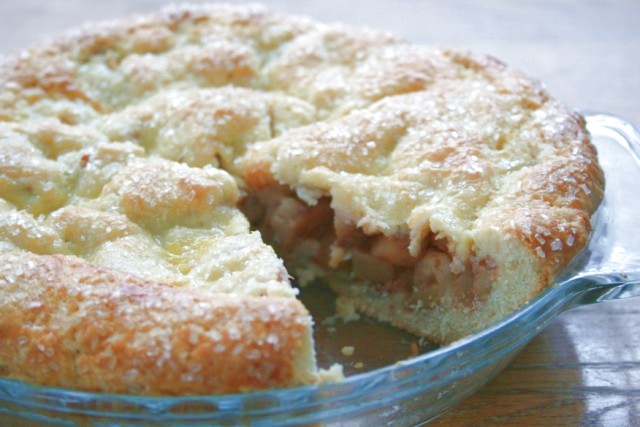
So, looking at my pile of fresh Granny Smiths, and considering how I might explore some of that Irish heritage, I came across a recipe on Joyofbaking.com for an Apple Scone Cake. Now, if the description of this recipe as posted on Joy of Baking is to be believed, the Apple Scone Cake is one of the most popular desserts made by home bakers in Ireland (can anyone confirm that??). It certainly sounded like an interesting recipe to try - and, for all I could tell, seemed as if it could be a real 'Irish' dessert. Why not give it a try? The concept is interesting - it's not really a 'cake' as I would think of it - it's really more of a cross between a cake and a pie. Imagine apple pie, but instead of the traditionally flaky pie crust, a more 'cakey' scone crust instead. Since I'm not yet experienced in the fine art of pie crust, but have successfully made scones, this seemed like a great gateway recipe to my first ever 'pie'

Overall the results were very good. Having made this, I would probably make the following changes the next time around: a bit more sugar/cinnamon in the apples - I used more apples than the recipe called for, but didn't add more sugar to account for that change. Second, I would bake it just a bit longer - I like my apples a bit softer, but this was still pretty good. Third, I might add just a few small pats of butter (not margarine) in with the apples. Lastly, I might add just a touch more sugar to the scone base. With all of that being said, I am including the full original recipe with no modifications so you can start at the same point as me. This is a hearty and tasty dessert - perfect for a cool fall evening - I will definitely be making this again.

Apple Scone Cake (originally from Joyofbaking.com)

2 Cups (280 grams) All Purpose Flour
1/2 Cup (100 grams) Granulated White Sugar
1 Teaspoon Baking Powder
1/4 Teaspoon Salt
1/2 Cup (113 grams)(1 stick) Unsalted Butter, Cold and cut in pieces
2 Large Eggs, Divided
1/2 Cup (120ml) Milk, Divided
1 Teaspoon Pure Vanilla Extract

Filling:
1 Pound (454 grams) Granny Smith Apples, peeled, cored and cut into 1 inch (2.54cm) chunks
2 - 3 Tablespoons (30-45 grams) Granulated White Sugar
1/4 Teaspoon Ground Cinnamon

Garnish:
Granulated White Sugar

Preheat over to 350 degrees F (177 degrees C) and place rack in the center of oven. Butter (or spray with nonstick cooking spray) a 9-Inch (23cm) glass pie plate.

In a small bowl, whisk together one egg and 1 tablespoon from the 1/2 cup milk. Set this aside for later use as a glaze for the top of the cake.

In a large bowl, whisk together the flour, sugar, baking powder and salt. Cut the butter in small pieces and blend into the flour mixture with a pastry blender or two knives. The mixture should look like course crumbs. In a separate small bowl, whisk together the remaining one egg, remaining milk and vanilla extract and add to the flour mixture, stirring just until the dough comes together. Do not overmix the dough.

Transfer to a lightly floured surface and knead the dough gently four or five times. Divide the dough in half. Pat one half of the dough onto the bottom and up the sides of the pie plate.

In a separate bowl, toss together the cut apples, sugar and cinnamon. Spread the apples evenly over the bottom of the dough in the pie plate.

Roll the remaining dough into a 9 inch (23cm) circle, on a lightly floured surface. Gently place the dough over the apples. With your fingers, seal the edges of the top and bottom crusts. Brush the top of the dough with the egg and milk glaze and sprinkle with white sugar. Cut a slit in the center of the dough to allow steam to escape.
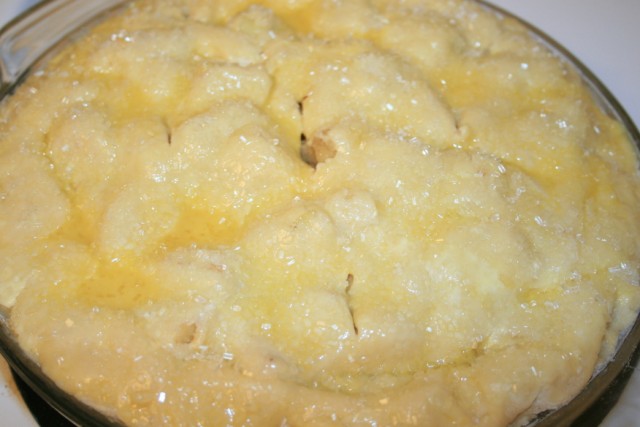
Bake in the preheated oven for about 35-45 minutes or until the pastry is nicely browned and a toothpick inserted into the center of the cake comes out clean.

Serves 6 to 8

Additional notes from Erik: I prefer to freeze my cut butter before working it into the mix, it helps keep it from melting, which is important to scone making. You can also bring this dough together in a food processor to help speed the process of cutting the butter into the flour mixture - I use this same method when I make scones and it works very well. This is a 'rustic' recipe, so don't worry if your crust doesn't look perfect. Lastly, I used 'decorators sugar' instead of regular sugar on the top of the cake - I like the look and crunch of the bigger sugar crystals.
Sunday, September 2, 2007

Freakin' Good Frittatas


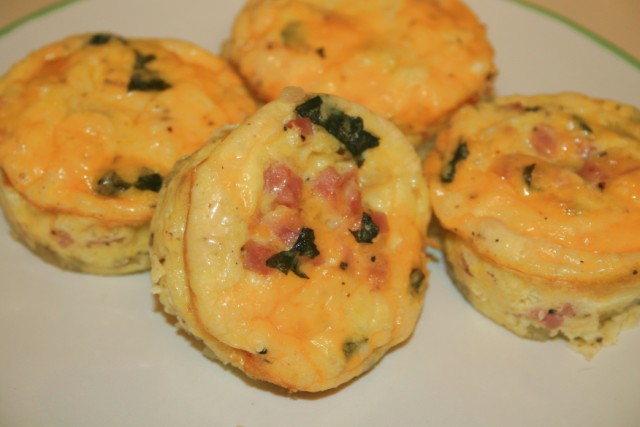
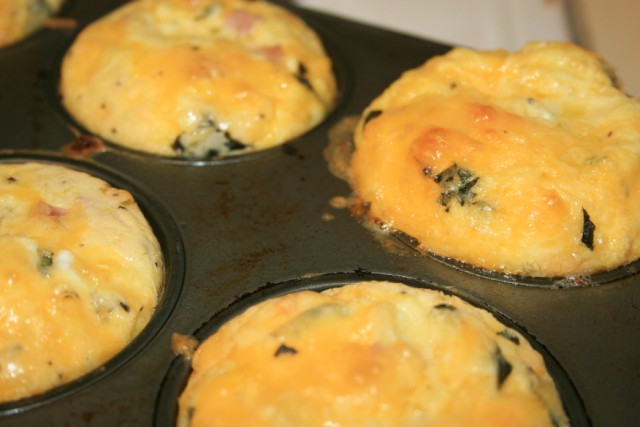
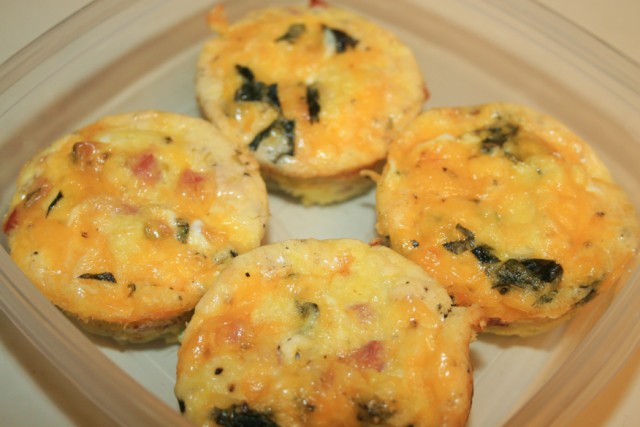
While this blog is primarily about baking sweet treats and other goodies, I must confess that I have a soft spot in my palette for all things breakfast. Given the choice, I would probably prefer to eat breakfast than any other meal of the day. With my work schedule, it's so rare that I get to have a hot breakfast (unless it's from a drive thru) that when I do get the chance, I can get pretty excited. For that reason, breakfast for dinner is a pretty regular occurance around our house. Pancakes, waffles, breakfast burrittos, breakfast scrambles, Swedish hotcakes, omelettes - bring 'em on. Part of the purpose of this blog is to help encourage me to be a bit more adventurous and to cook things I've never tried before - it's just too easy to stick with what you know and not bother with learning a new recipe. That being said, when I see a new breakfast/brunch recipe, it tends to peak my interest. So it was while watching one of my favorite Food Network chefs, Giada De Laurentiis when she made 'Mini Frittatas' one day - they looked so good, I didn't wait for the show to finish before I headed to the kitchen.

Giada's recipe uses a basic frittata base, adds a few basic ingredients, then, unlike a traditional frittata, which would be cooked in a skillet and finished in the oven, she cooks them in mini muffin pans to make some great little bites. I knew I wanted to make a few changes, so I grabbed some potatos I had on hand and rather than using the mini muffin pan, went for the regular size muffin pan - I wanted something a bit more than a little bite. Like an omelette, frittatas lend themselves very well to customization. You can add pretty much anything that strikes your fancy and that won't offend any potential taste subjects. Put it all together, bake, and you have a tasty, portable and attractive little meal. These can be eaten warm or cold and lend themselves quite well for traveling - a great idea for picnics or even a roadside snack for a long trip.

Mini Frittatas (adapted from Mini Frittats by Giada De Laurentiis on Food Network.com)

This is the recipe as made with my modifications...Makes 14-18 frittatas depending upon the size of the pans and how full you fill them.
8 Large Eggs
1/2 Cup Whole Milk (I used non-fat)
1/2 Teaspoon Freshly Ground Black Pepper
1/4 Teaspoon Salt
2 Medium Potatos, peeled and shredded
1/2 Medium Onion, minced
1 Cup Cooked Ham, chopped
1 Cup Sharp Cheddar, grated
Fresh Basil, finely chopped
Olive Oil
Spray Oil

1. Preheat oven to 375 degrees F.

2. In a medium skillet, saute the shredded potatoes and onion in the olive oil over medium heat until the potatoes have softened and the onions are translucent - about 15 minutes. Season with salt and pepper.

3. Whisk together the eggs, milk, basil, pepper and salt in a large bowl to blend well.

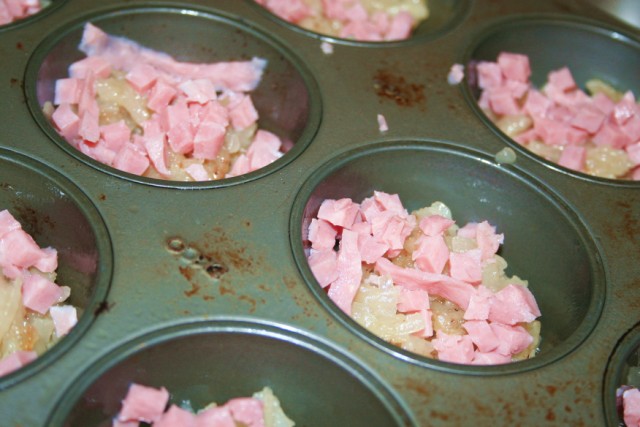
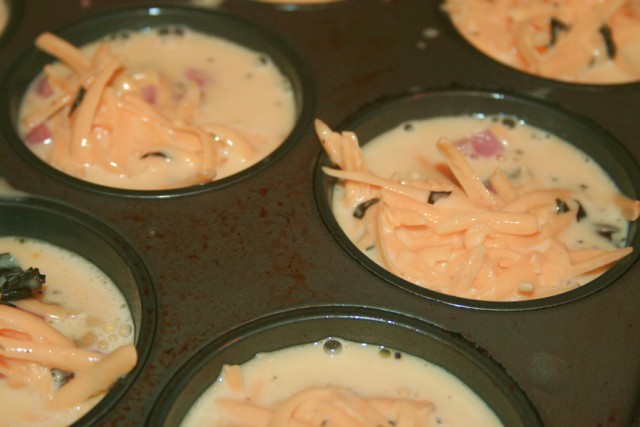
4. Spray muffin pans with non-stick cooking spray. Fill each cup with approximately 2 tablespoons of the potato/onion mixture. Add approximately 1 tablespoon ham and 1 tablespoon shredded cheese. Fill the cups with the egg mixture, about 7/8 full. Once the cups are all filled, tap the pan on a hard surface to make sure the egg mixutre has filled in around all of the ingredients.


5. Bake for 14-18 minutes (individual ovens will vary) until lightly browned and somewhat firm. Remove from oven and cool for 5 minutes. Run a knife around the edges of the frittatas to loosen them from the pan. Turn the frittatas out on a wire baking rack. Serve warm or cold with (in my opinion) a dollop of sour cream.


Sunday, August 26, 2007

SHF #34 - Going Local with Filberts and Blackberries

Being relatively new to blogging, I thought it would be a good idea to jump in on one of the cooking events out there. The one that particularly caught my eye was SHF or 'Sugar High Friday'. Since the tagline for my blog is 'one man's search for dessert perfection', it only seemed natural that an event involving sugar would fit well with my primary purpose for this blog. This month's theme is 'Going Local' and the idea is to showcase local delicacies from your region. I have to say I had a hard time trying to come up with an idea for this one. When I think of the Northwest, and particularly, Oregon, I tend to think of Salmon - and that just wasn't going to fit well for a SHF event. So I just tried to think of a local ingredient or dish that would represent us here.


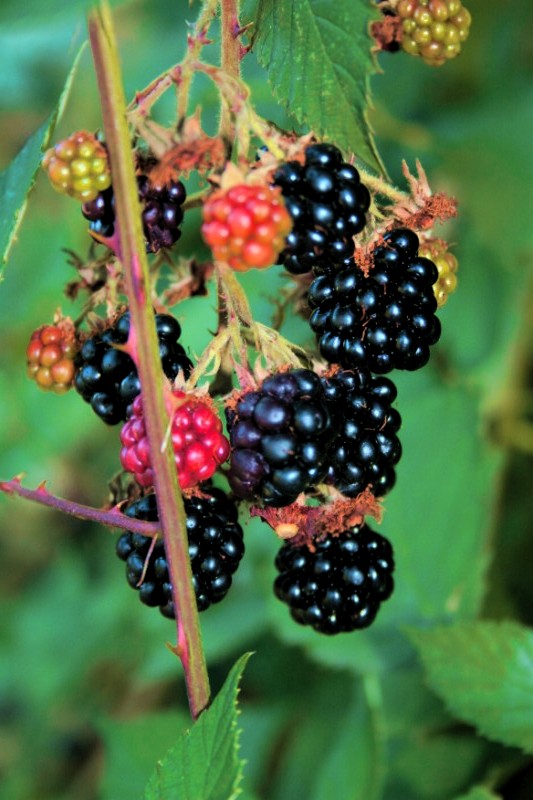
I really was having a hard time with this. I can't really think of a dish that says Oregon. We're quite a mix of many different influences - everything from Native American to Asian to European to Mexican - you can find it all here. Willamette Valley in Oregon is also becoming world renowned for it's Pinot Noir, but I just couldn't think of a good way to work it in to my baking - perhaps another post. My own ancestors are from Sweden and Ireland, and while both are well known for their baked goods, even those dishes didn't really say 'Oregon' to me. So, I was in my back yard a few days ago when it hit me, or rather, scratched me - Blackberries. I was reminded of the fact that Oregon, in particular, the Willamette Valley, is considered the 'caneberry capital of the world'. Caneberries? If you are not familiar with that term, it refers to any berries grown on planta that grow large stocks, or canes. Some of these 'caneberries' include blackberries, raspberries, Loganberries, and our very own, Marionberries (uniquely grown only here in Oregon, and quite a tasty berry I might add). I originally thought about showcasing Marionberries (a cultivar of blackberries), but the season was over and I wanted to go fresh, not frozen. It just so happens I have a thriving blackberry plant growing in my back yard, and there were plenty of berries to go around. What to make? I wanted to do something other than a blackberry pie, muffins or tart. I wanted to stick with a baked item, but something we enjoy frequently in the NW. Thinking again of coffee (I think I need a cup, I can't get it off my mind) I considered scones. Definitely not a Northwest creation, we do enjoy these tasty little baked treats in the coffee shops that dot our landscape. As I was considering a recipe for blackberry scones, I just wasn't happy with the idea of a blackberry scone. Not long after that, I was struck in a moment of inspiration to consider another very Oregon ingredient - Filberts.


What is a Filbert, you may ask? Well, around most of the world, Filberts are known as Hazelnuts, but here in Oregon, one of only 4 places in the world where these nuts are grown, they are referred to by fans and growers as Filberts. Though Oregon represents only a small amount of the total hazelnuts produced worldwide (Turkey is the largest producer), the hazelnuts grown in the temperate climate of Oregon are considered to be the biggest and tastiest in the world. I wanted to use a recipe that could really show off the great flavor of this nut. Since we have such strong ties to coffee and baked goods here in the Northwest, I thought I'd try my hands at a goodie I've wanted to bake for awhile now, so I tracked down a basic recipe for scones, and went from there.

That being said, I still had the blackberries to consider. I still wanted to use them, but I wanted something unique. Thinking back to a tea event I did some cooking for awhile back, it struck me - curd. This traditional English dish is most commonly made with lemons, but many other fruits can be used. Curd is a type of preserve that uses fruit juice, sugar and eggs. It is smooth and creamy and pairs well with scones (as well as making a great filling for cakes and other pastries). Now I had my recipes in order.

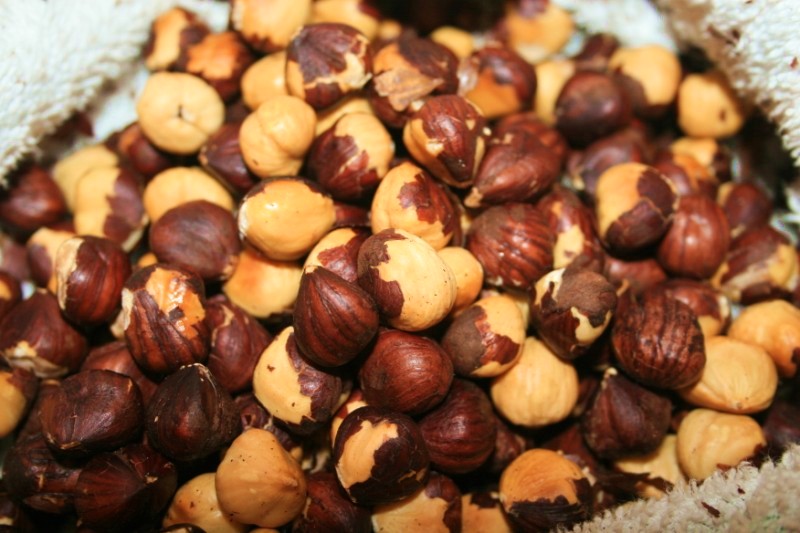
Since I have never made scones before, I was concerned that I wouldn't get the right texture. A friend of ours, who is quite the hand at making scones, was out of the country, so thanks to my old standby for recipes, Allrecipes.com, I found a basic scone recipe and some great tips from readers. Following their lead, I decided to make the dough entirely in a food processor, and I'm glad I did. The recipe calls for frozen butter, cut into small pieces, and then incorporated into the flour mixture using a pastry knife or by hand. The food processor, made this step very fast and turned out a well incorporated, yet not overworked, dough. For the hazelnuts, I purchased raw whole nuts and toasted them myself in the oven at 400 degrees F for 8 minutes on a foil lined baking sheet. I removed most of the skins by wrapping them in a kitchen towel, letting them sit for 5 minutes, then rubbing the toasted nuts in the towel. Boy, did that smell good!

Many thanks to Johanna at The Passionate Cook for her choice of themes for this month's SHF. It really made me think about what dishes and ingredients I have to work with in my area, and I think, has enlightened me about being more aware of some of those choices. Also, thanks to Jennifer of Domestic Goddess for starting SHF. You can find the information on this month's SHF by clicking here. Update - Johanna has posted the results for this month's SHF and can be found here - be sure to check out some of the great entries from all over the world.

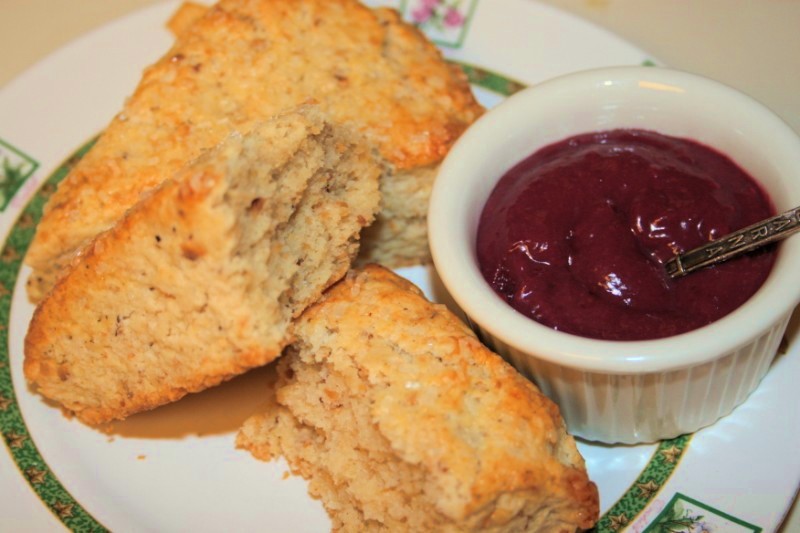
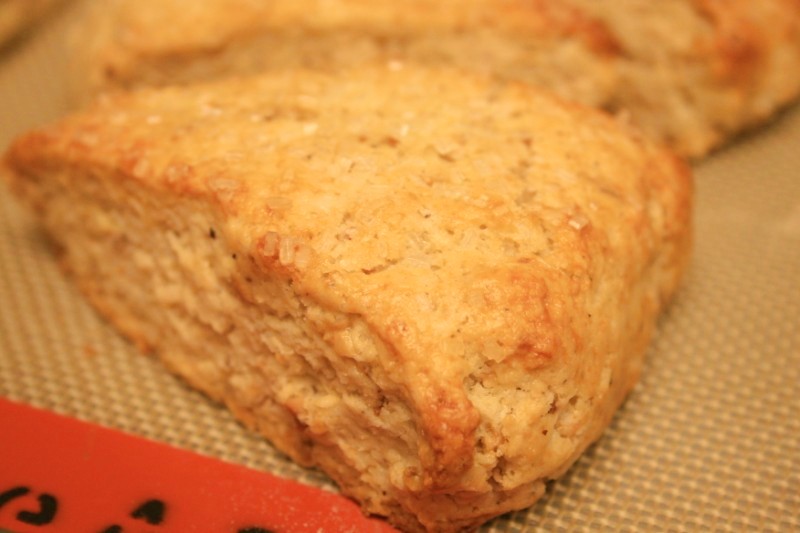
Overall, I was very pleased with my results. The scones, in my opinion and the opinion of Mrs. wannabe baker, came out very well. I can definitely say there is no replacement for freshly toasted nuts - they really came through in the scones. In fact, the scones would have been great on their own, however, the blackberry curd really went nicely with the nutty flavor of the scones without overpowering them.

Following are the recipes I used for this post, as I made them, including the few modifications I made. If you would like to know a little more about Oregon Filberts, follow the link here for an interesting article from Saveur magazine.

Hazelnut Scones (adapted from Simple Scones from Allrecipes.com)

2 Cups All-Purpose Flour
1/3 Cup Sugar
1 Teaspoon Baking Powder
1/4 Teaspoon Baking Soda
1/2 Teaspoon Salt
8 Tablespoons Unsalted Butter, Cut in small pieces and frozen
3/4 Cup Toasted Hazelnuts, finely chopped (I used a coffee grinder to chop mine)
1/2 Cup Sour Cream
1 Large Egg

Plus, 1 additional egg, 1 tablespoon milk and decorator's sugar

1. Pre heat oven to 400 degrees F and adjust oven rack to lower-middle position.

2. In a food processor or large bowl, combine flour, sugar, baking powder, baking soda and salt, mix briefly. Add frozen butter. For the food processor, pulse until the butter is incorporated - it should resemble course meal. If you are not using a food processor, mix the butter into the flour with a pastry blade or two knives.

3. In a small bowl, whisk together 1 egg and the sour cream until smooth.

4. Add the sour cream/egg mixture and the hazelnuts into the food processor. Process until a ball of dough forms, about 1 minute. For those not using the food processor, mix the sour cream/egg mixture and the hazelnuts in with a fork. Once combined, use your hands to press the dough together until it forms a ball.

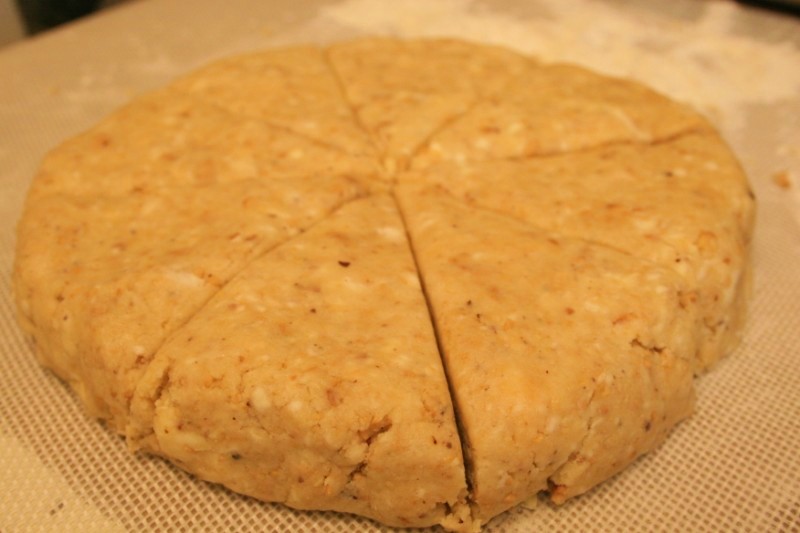
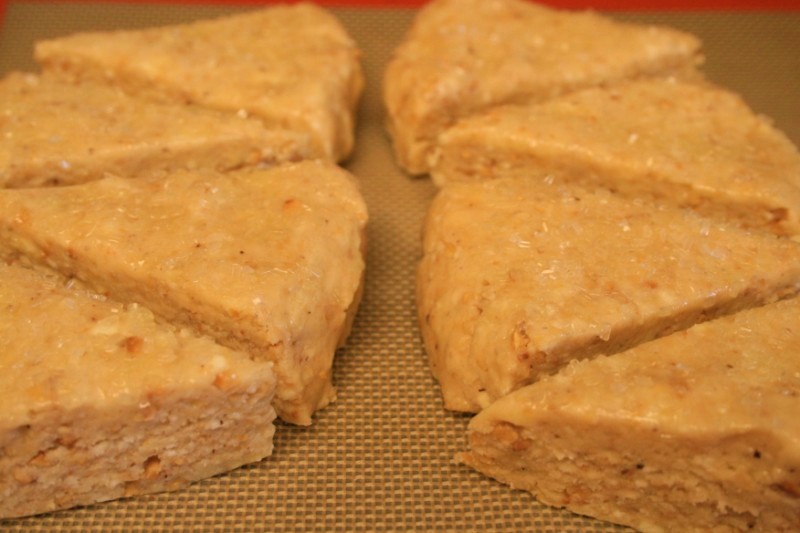
5. Place the dough on a lightly floured surface and pat into a 7 to 8 inch diameter circle, about 1 1/2 inches thick. Cut into 8 triangles. Whisk together the remaining egg and milk and brush onto the scones. Sprinkle with decorator's sugar.

6. Place scones on a baking sheet lined with parchement paper or a silicone baking mat. Space the scones approximately 1 inch apart. Bake until golden, about 15 - 17 minutes. Cool for 5 minutes, serve. Scones can be frozen and used later.

Blackberry Curd (adapted from Triple Berry Curd from Cooking Light Magazine)

3 Cups Blackberries (fresh or frozen, thawed)
2/3 Cup Sugar
1 Tablespoon Cornstarch
1/8 Teaspoon Salt
2 Tablespoons Fresh Lemon Juice
3 Large Eggs
2 Tablespoons Unsalted Butter

1. Place berries in a blender or food processor and process until smooth. Press berry mixture through a sieve. Reserve 1 cup of the puree for the curd, refrigerate any leftover. Discard the seeds.

2. In a medium, heavy saucepan, combine sugar, cornstarch and salt. Whisk together. Add 1 cup blackberry puree, lemon juice and eggs. Bring to a boil over medium heat, stirring constantly. Reduce heat and simmer 1 minute or until thick, stirring constantly. Remove from heat and add butter, stir until butter is melted and combined. Cool at least 6 hours before serving. Store in the refrigerator up to 4 weeks or freeze up to 1 year.


Friday, August 10, 2007

Cheese Me, Please Me

There are a number of recipes out there that I long to bake, but not just bake, bake well. Perusing through bakeries, foodie blogs, magazines and cookbooks, I find myself wishing I could duplicate some of the wonderful creations out there.

I am plagued, however, by something that stops many fledgling bakers from achieving their desires: Fear. Yes, fear. Fear of failure. As silly as it may sound to some folks, fear of failure can be a powerful barrier to attempting to conquer new challenges. For those of us that don't have the benefit of a formal cooking school education or a chance to apprentice under an experienced baker, the thought of trying to duplicate some of the more difficult recipes can be daunting. Not only that, some of those recipes call out some spendy ingredients - I don't know about some of you out there, but I really have a hard time putting a couple of hours of work and some of my hard earned money into something if it isn't going to turn out right the first time. I know, I know, that's a somewhat unrealistic expectation - you can't expect to do everything right the first time, and you can sometimes only learn from your failures. That's very true, but it doesn't make it any easier.

I had always wanted to try a cheesecake, but had always passed on the chance because I feared the results wouldn't be any good. I have collected more cheesecake recipes than I can count, watched numerous Food Network chefs make this dessert over and over, and read many comments on Allrecipes about the trials of folks attempting to recreate this luscious treat. Something finally urged me on to finally try this out - I think it was the 5 packages of cream cheese sitting in the refrigerator. I had purchased them in the hopes of making a cheesecake, but for awhile, there they sat, staring at me, reminding me that I had taken the first step, but now I needed to follow through. One day, I noticed that I was getting closer to the expiration date - I was not going to through out those wonderful creamy bricks, and I was certainly not going to just turn them into some kind of dip again. No, it was time to commit. So, I jumped in to my recipe archive.

Allrecipes.com is a favortie source of recipes for me. I found this site about 5 years ago and make regular visits to see what's new out there. I often find recipes I want to try and save them on my computer for later review. What I like about the site is the vast number of readers that leave their comments - some of them really make a huge difference in these recipes. Often, a reader will note a particular step may have been left out, or perhaps they will further clarify on a technique that some of us may not be totally familiar with. So, I grabbed a recipe rated 5 stars that had plenty of comments from folks that had made this recipe before. There were some great suggestions about having your cream cheese at room temperature prior to mixing and about using a Bain Marie (water bath) to cook the cheesecake even though it wasn't part of the recipe. My choice was the NY Cheesecake III. It had a different crust than most, but the readers seemed to have very positive results with this one - and, many used it as their first attempt at cheesecake as well.

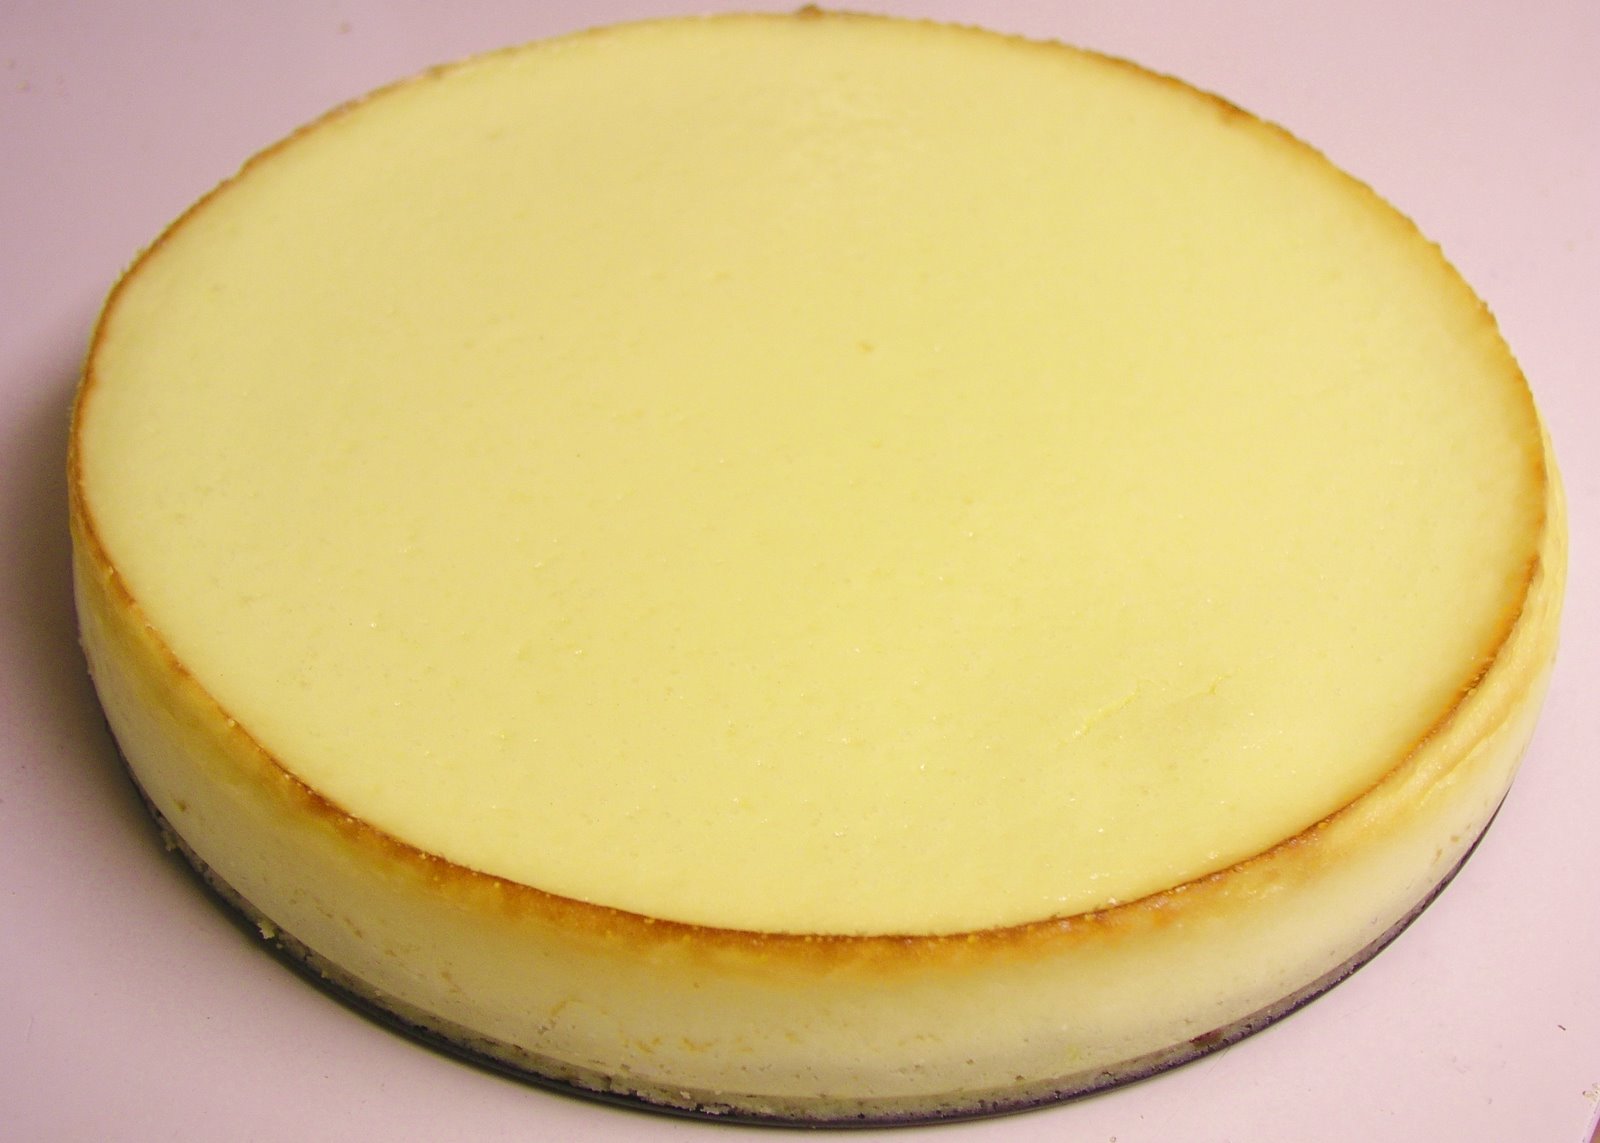
My results? Well, the picture above says a lot. One of my bigger fears was the dreaded 'crack' running through the middle of the cake. What can I say, it came out better than I could have expected. Only slightly browned around the edges, just slightly 'jiggly' at the very center, and smoooooth on top - only 2 tiny cracks that were very hard to spot. How about the taste? I made this for a family gathering (violating one of my personal rules about 'testing' recipes on large groups when you don't have a backup recipe on hand). What can I say, they loved it. Many thought it was store bought. It was creamy, flavorful and had just the right balance of density.

What did I learn? Well, I'm very thankful for the suggestions on Allrecipes. I believe that getting the cream cheese to room temperature had a big effect on this recipe. I chose mix the cream cheese batter by hand as some suggestions noted that over mixing was a bad thing too. I would have been unable to mix this by hand if the cream cheese had not been softened. Next, the water bath. One drawback to the water bath is the water seeping in to your pan. Most folks suggest wrapping the pan with a layer of heavy foil, but one person noted using a cooking bag. I just happened to have one on hand, so I placed that around the pan, placed the pan on a large baking sheet, and poured some near boiling water in the pan (after it was already sitting in the oven - didn't want to spill anything). The hardest part about this recipe was patience. Many readers noted, as did the recipe, to leave the cake in the oven for an hour (or more) once the cooking time was completed and the oven was turned off - this is supposed to help prevent cracking. I have to tell you, I was like a little kid on Christmas morning, pacing back and forth, wondering what was hidden behind that door, but I was determined not to open it, I just didn't want to risk ruining this recipe. I actually ended up leaving the cake in the oven overnight instead of the 1 hour recommended in the recipe. When I got up early the next morning, I opened the oven to find the cake pictured above. (I'm sorry for such a plain photo here, I just had to show how smooth the top of this cake turned out)

So, I've managed to conquer one of my fears. Cheesecake is off the list of baking don'ts and on the menu of the wannabe baker. It really wasn't all that bad. Of course, the next test is to see if I can duplicate the results and be sure the first attempt wasn't just a fluke. That aside, I now can feel more confident about tackling another item on my list of mose feared recipes - what that will be remains to be seen.

NY Cheesecake III - from Allrecipes.com
NY Cheesecake III

Crust:

1 1/2 Cups All-Purpose Flour
1/3 Cup White Sugar
1 Egg, Beaten
1/2 Cup Unsalted Butter, Softened

Batter:

2 1/2 Pounds Cream Cheese, Room Temperature
1 3/4 Cups White Sugar
3 TBLSP All-Purpose Flour
5 Eggs, Whole
2 Egg Yolks
1/4 Cup Heavy Whipping Cream

1. Preheat oven to 400 degrees F (200 degrees C). Lightly coat a springform pan with spray oil. Note: You could use a 9x13 inch pan instead.

2. To make the crust: Combine 1 1/2 cups flour, 1/3 cup sugar, 1 egg and 1/2 cup butter. Spread to the edges of the pan. Prick all over with a fork, then bake 15 minutes. Remove from oven and allow to cool.

3. Increase oven temperature to 475 degrees F (245 degree C). In a large bowl, combine the cream cheese, 1 3/4 cups sugar, 3 TBLSP flour, 5 eggs and 2 egg yolks. Mix thouroughly. Add 1/4 cup cream and mix only enough to blend.

4. Pour filling over crust and bake for 10 minutes at 475 degrees F (245 degrees C). After 10 minutes, reduce temperature to 200 degrees F (95 degrees C) and continue to bake for 1 hour. Turn off the oven, but leave the cake in the over for another hour. Remove from the oven, the center may still jiggle a bit - that's okay.

5. Chill overnight - don't skip this step. Serve plain or garnished with your favortie fruit.

My notes:

First, though the recipe doesn't call for it, I used a water bath, as I described in the post above. Second, be sure not to overmix your batter. Third, while the crust was good, it was almost too sweet for the cheesecake. When I make this again, I may go back to the standard graham type crust.

I served this with the Supreme Stawberry Topping, also from Allrecipes.com
Supreme Strawberry Topping

If you've never tried a cheesecake before, give it a shot, you just may be able to get past one of your recipe fears. I finally have.

Thursday, August 2, 2007

A humble beginning...


Welcome to Baking in Oregon, my brand new blog.

As you can probably tell by the title, I'm planning to post about baking. While my primary focus will be on baking sweet treats and desserts of all kinds, I imagine there will be some savory dishes mixed in here and there. I'm not necessarily going for an Oregon flair in my baking, it just happens to be my home and a place I'm proud to live. If some NW inspired recipes and ingredients do happen to make their way in, then that's a bonus.

I've been interested in cooking since I was a kid. While I had several people who influenced my interest in cooking, it was my grandfather who really got me started. We started simply, making easy snacks for my brother and sister and I such as bread with melted cheddar and season salt. Eventually, he, along with my grandmother, would let me help prepare dinner. One recipe in particular that stands out in my memory was one I had a hard time understanding as a kid - Mousse. I just couldn't figure out why this very tasty chocolate 'pudding' was named after a big animal. I also had a hard time understanding why he kept telling me that the tasty beef sauce I used for my french dip was called au jus. It's funny to recall how the mind of a child interprets things which our adult minds don't give a second thought.

Since then, some years have passed and my interest in cooking has grown to a desire to spread my wings a bit and dig into those areas of cooking that have long haunted me - specifically, baking. For me, many of my past 'baking' experiences included opening the box, adding the eggs, water and oil, mixing together, throwing it in the oven, and considering myself a good cook. That might have been okay for a kid learning to use an oven or even as a bachelor just hoping to put something hot on the table. But now it's time to learn the ways of the baker. It's time to learn that brownies don't have to come from a pre-packaged mix. It's time to learn that bread doesn't need to come from a plastic bag. It's time to learn how to make a proper 'sponge'. It's time to learn about 'proofing' and why a 'financier' has nothing to do with money. It's time to put that beautiful new KitchenAid mixer to work! In short, it's time to do those things I've always wanted to do but have been stopped by my fear of failure - well not any more.

After reading a number of foodie bloggers out there, I've found myself inspired not only to start this blog, but to start challenging myself in the kitchen. I may even consider joining up with a group like the Daring Bakers to see if I can conquer some of their 'Daring' recipes.

My motivations? Well, first, my wife, who has supported me through my past kitchen successes and failures. She has endured the pain of living with a 'wannabe baker' gathering up cookbooks, new utensils, pans, ingredients and anything else to clog up our little kitchen. Yes, through it all, she's always there to lick the bowl. Friends and family are next. I may look like I like to eat (and I do), but I really get my enjoyment in making a dish for someone else and having them say 'ohhh...' at the first bite - if I get that reaction, I know I've done okay. Really though, there is nothing like cooking for other people. I mean, food is one of the key ingredients to any gathering. Whether it be for 2 or 22, good food just makes it more fun - and dessert, well that just highlights any food based gathering. Last, but not least, my little girl. Sure, the only raspberries she can understand right now are the kind she makes at me while I'm trying to concentrate on something important, but someday, she'll be old enough to know what a real raspberry is, and what wonderful things you can do with them. Yes, once she's old enough to wield a spatula, she'll be out of the crib and into the kitchen to cook with daddy.

As a part of this blog, I'm also planning to improve upon my photography skills, especially in the subject of still life and, in particular, food photography. I've done okay with scenics and portraits, but I've seen some pretty awesome food photos on many of those blogs out there (Kieran at Ice Cream Ireland comes to mind) and I'm looking forward to testing my skills with a camera as well as with an oven. The photo I've attached to this first blog shows the Cape Mears Lighthouse on the Oregon Coast. This photo recently took 3rd place in a local photo contest, so I thought I'd share it here.

What else will this blog be about? Well, baking/cooking will be the #1 topic. That being said, I'll probably splash a few other topics in here and there. Maybe some thoughts on Oregon and the Northwest. Maybe a little talk or two about healthier eating and exercise (because I really need it!). Who knows what else may crop up from time to time.

So please join me as I start my adventure into the fun and frustrating world of baking. I'd love to get feedback from you folks out there. If you have your own foodie blog, let me know, I'd love to check it out. Got a recipe you think I should try, let me know. Got tips or suggestions that could turn my failures into success? Let me know.

Now, what do I start with??? Hmm...